Pokemon Snap Walkthrough!
Click to go to any point in the Walkthrough!
1.Beach
2.Tunnel
3.Volcano
4.River
5.Cave
6.Valley
7. Backtracking and Pokemon Signs
8. Rainbow Cloud
1.Beach
2.Tunnel
3.Volcano
4.River
5.Cave
6.Valley
7. Backtracking and Pokemon Signs
8. Rainbow Cloud
Course 2: The Tunnel
Stage Stats!
Snappable Pokemon: 12
Difficulty: 2.5/5
Course Size: 3/5
Pokemon Sign: Pinsir
Todd's Input: "There used to be a power plant in this long, dark tunnel. I can't wait to check it out!"
Soundtrack: Click here to access music!
Difficulty: 2.5/5
Course Size: 3/5
Pokemon Sign: Pinsir
Todd's Input: "There used to be a power plant in this long, dark tunnel. I can't wait to check it out!"
Soundtrack: Click here to access music!
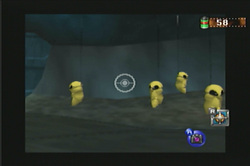
Once you begin you can go ahead and photograph the Pikachu on your right, and prime your camera in order to photograph an electabuzz that will be chasing an electrode. It goes without saying that you should photograph the Electrode as well. As you go on, you will notice many Kakuna dangling from the ceiling, prime your camera and wait for many of them to come down at once. Hopefully, one of them was in the center of your camera for the highest possible score.
Pokemon Profile: Electabuzz

Stage: Tunnel
Species: Electric Pokemon
Pokemon Number: #125
Pokemon Type: Electric
Use Pokemon food to lure Electabuzz near you and get a good shot!
Species: Electric Pokemon
Pokemon Number: #125
Pokemon Type: Electric
Use Pokemon food to lure Electabuzz near you and get a good shot!
Pokemon Profile: Electrode

Stage: Tunnel
Species: Ball Pokemon
Pokemon Number: #101
Pokemon Type: Electric
Throw pokemon food to get these bomb like pokemon to explode for extra points!
Species: Ball Pokemon
Pokemon Number: #101
Pokemon Type: Electric
Throw pokemon food to get these bomb like pokemon to explode for extra points!
Pokemon Profile: Kakuna

Stage: Tunnel
Species: Cocoon Pokemon
Pokemon Number: #6
Pokemon Type: Bug
Throw Pokemon food at Electrodes in order to make a large group appear, then use the dash engine to get close for the best shot!
Species: Cocoon Pokemon
Pokemon Number: #6
Pokemon Type: Bug
Throw Pokemon food at Electrodes in order to make a large group appear, then use the dash engine to get close for the best shot!
???????
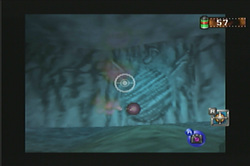
Now, as you pass the gate which will lead you onward, prime your camera and wait for a Zubat to come flying towards you. I recommend spamming the A button in order to find the perfect one. There are two of them in the course, so don't panic if you miss one. Keep rolling along until you see a purple sphere flying in circles. Take a picture of this ball as it comes toward you and later, during the photo checking process, it will reveal to be Haunter!
Pokemon Profile: Zubat

Stage: Tunnel
Species: Bat Pokemon
Pokemon Number: #41
Pokemon Type: Poison/Flying
Prime your camera and snap as much as you can for the best chance of getting the perfect shot!
Species: Bat Pokemon
Pokemon Number: #41
Pokemon Type: Poison/Flying
Prime your camera and snap as much as you can for the best chance of getting the perfect shot!
Pokemon Profile: Haunter

Stage: Tunnel
Species: Gas Pokemon
Pokemon Number: #93
Pokemon Type: Ghost/Poison
Photograph the purple spheres flying around this stage and they will reveal to be a haunter! Try and get it as the ball flies toward you for the best shot!
Species: Gas Pokemon
Pokemon Number: #93
Pokemon Type: Ghost/Poison
Photograph the purple spheres flying around this stage and they will reveal to be a haunter! Try and get it as the ball flies toward you for the best shot!

Smile for the camera.
As the door flies open, you have another chance to capture Zubat. But more importantly, take a picture of the approaching Diglett as soon as possible, then again, then again, then one last time and it will appear as a Dugtrio. Continue onwards and take note of the Magnemites that run away when you try and take a picture. Exit the stage and, if you followed this walkthrough, Prof. Oak should hand over his sna-... Pokemon food over for you to use. Once you have finished gazing at his beautiful face, select the Tunnel option from the menu again.
Pokemon Profile: Diglett

Stage: Tunnel
Species: Mole Pokemon
Pokemon Number: #50
Pokemon Type: Ground
Try to capture it as it communes with the Pikachu for extra pose points!
Species: Mole Pokemon
Pokemon Number: #50
Pokemon Type: Ground
Try to capture it as it communes with the Pikachu for extra pose points!
Pokemon Profile: Dugtrio

Stage: Tunnel
Species: Mole Pokemon
Pokemon Number: #51
Pokemon Type: Ground
Photograph Diglett three times in order to capture it as a dugtrio!
Species: Mole Pokemon
Pokemon Number: #51
Pokemon Type: Ground
Photograph Diglett three times in order to capture it as a dugtrio!

Poor Electrode...
Continue through the course until you reach the end, you may now photgraph the magnemites by throwing food to them. Lure three of them together and proceed to snap Magneton. If you're quick, you can also throw an apple at the electrode smiling innocently to your left. It will explode and open up the third stage! See you there, after the pokemon profiles for Magnemite and Magnetron of course.
Pokemon Profile: Magnemite

Stage: Tunnel
Species: Magnet Pokemon
Number: #81
Pokemon Type: Electric/Steel
These floating magnets love to be bribed with Pokemon food!
Species: Magnet Pokemon
Number: #81
Pokemon Type: Electric/Steel
These floating magnets love to be bribed with Pokemon food!
Pokemon Profile: Magneton

Stage: Tunnel
Species: Magnet Pokemon
Number: #82
Pokemon Type: Electric/Steel
Lure three Magnemites together and center it using the top Magnemite for the best shot!
Species: Magnet Pokemon
Number: #82
Pokemon Type: Electric/Steel
Lure three Magnemites together and center it using the top Magnemite for the best shot!
